Paint master (Android App)

Cover art

This app lets you paint a car/ paint a fruit and clean windows. These are simple activities for the kids. Kids love these activities especially when they have to paint something. There is nothing like it . This app is not just for the kids but for adults too. This is good time pass app.

Paint a car: you have to pick a car which needs to be painted, then pick a color and start painting.
Paint a fruit: you have to pick any fruit from the list and then pick a color, start painting.
Clean windows: you have to select the window and pick up a season (rainy, windy, frosty)


Paint master - screenshot thumbnailPaint master - screenshot thumbnailPaint master - screenshot thumbnailPaint master - screenshot thumbnailPaint master - screenshot thumbnail

Paint master


Sharepoint Item level security – Workflow

Sharepoint has a feature to set item level security either manually or through workflow. In some case we might need to dynamic. (Ex: When we restrict people to view only their region data, we can either create different views per region or create a workflow to set the security level based on their region ) . But if its a sensitive data, creating a view doesnt make sense. Somehow we can pull up the data even by creating our own view). This article shows you how to set item level security using SharePoint workflow

1. Select impersonation step, it creates an unique step 

2. Now if you click on “Action”, you will notice some new list actions. Add list permission, Inherit list permission, …

with this actions, you can modify current item’s permission or any other list’s item permission.

Catch Me ■■ (Android app)


Catch Me ■■


Cover art

Concentration game: The object of the game is to catch the red box when it appears. It may appear in any box, So it needs a very good focus. Every 15 catches, it will take you one level up. Kids will go crazy. – It improves kids concentration, grasping power – It has many options of selecting no of grids – It has a different color themes Right now you will have to focus only one red box, in the next version, it will be two red boxes to increase your concentration and make you use two fingers…. with many more options are coming soon…

• It improves kids concentration, grasping power. (its not just for the kids, it increases concentration power to anyone)
• It has many grid options to select.
• It has different color themes.

Catch Me ■■ - screenshot thumbnailCatch Me ■■ - screenshot thumbnailCatch Me ■■ - screenshot thumbnail

List Templates in webOS

List widget has many properties, among which there are
listTemplate [optional]
itemTemplate [required]
emptyTemplate [optional]

listTemplate
In listTemplate file (optional; defines HTML template for list’s container; if omitted, list items are added to scene with no container):

<div style="background-color: #1e1e1e;color:#FFFFFF;height:55px;">
MyList
</div>
<div>
	#{listElements}
</div>

If ListTemplate is been defined, then you need to mention where those items should be populated. where #{listElements} refers to the list items. if #{listElements} not mentioned, then it wont populate the items.

itemTemplate
defines HTML template for list items

<div class="palm-row">
<div id="storyText" class="listText truncating-text">#{data}</div>
</div>

in ListExample-assistant.js

ListExampleAssistant.prototype.setup = function() {
	this.controller.setupWidget("listId",
	  this.attributes = {
	      itemTemplate: "ListExample/myRowTemplate",
	      listTemplate: "ListExample/myListTemplate",
	      swipeToDelete: true,
	  },
	  this.model = {
	      listTitle: "List Title",
	      items : [
	          {data: "Item 1"},
	          {data: "Item 2"},
	          {data: "Item 3"},
	          {data: "Item 4"},
	          {data: "Item 5"},
	      ]
	  }
	);
};
listTemplate 

<div style="background-color: #1e1e1e;color:#FFFFFF;height:55px;">
MyList 
</div>
<div>
#{listElements} 
</div>

itemTemplate

<div class="palm-row" x-mojo-tap-highlight="momentary"> 
<div style="float:left">#{data}</div>
</div> 
listTemplate 

</div> <div class="palm-group">
<div class="palm-group-title">
My List 
</div>
<div class="palm-list">
#{-listElements} 
</div>
</div>

Where palm-group / palm-group-title and palm-list are inbuilt classes

 itemTemplate

<div class="palm-row" x-mojo-tap-highlight="momentary"> 
<div style="float:left">#{data}</div>
</div> 
in scene assistant: 
if listTemplate not mentioned, then the listeitems will be populated
directly into the scene.

		ListExampleAssistant.prototype.setup = function() {
	this.controller.setupWidget("listId",
	  this.attributes = {
	      itemTemplate: "ListExample/myRowTemplate",
	      swipeToDelete: true,
	  },
	  this.model = {
	      listTitle: "List Title",
	      items : [
	          {data: "Item 1"},
	          {data: "Item 2"},
	          {data: "Item 3"},
	          {data: "Item 4"},
	          {data: "Item 5"},
	      ]
	  }
	); 	
};


itemTemplate

<div class="palm-row" x-mojo-tap-highlight="momentary"> 
<div style="float:left">#{data}</div>
</div>	

Database to list in WebOS

This tutorial shows how to insert record into SQL Storage(HTML5) and Populate the rows in List widget.

Refer to List Widget

Step1 : Create Basic Scene “DatabaseList”

in DatabaseList-Scene.html

<div>Database Tutorial</div>

<div id="textField"></div>
<div id="button-1"></div>
<div id="listId" class="listClass"></div>

Step2 : Create one html file for List Widget
in myRowTemplate.html

<div class="palm-row">
<div style="float: left;">#{data}</div>
&nbsp;

</div>

Step 3: DatabaseList-assistant.js Creating a new table named”ofive_table” with two columns ID – Autoincrement Column Title – Text column

DatabaseListAssistant.prototype.setup = function() {
var name = "MainDB";  // required
var version = "1";  // required

var db = openDatabase(name, version);

if (!db) {
  Mojo.Log.error("Could not open database");
} else {

  db.transaction(
  	function (transaction)
  	{
	    transaction.executeSql("CREATE TABLE IF NOT EXISTS Ofive_Table(id integer primary key autoincrement, Title TEXT)",[],
    		function(transaction, results)
    	       {Mojo.Log.info("Successfully created table")},
               function(transaction, error)
               {Mojo.Log.error("Could not create table: ")});
  });
}
this.controller.setupWidget('button-1',{},{buttonLabel: 'Insert'});
this.controller.setupWidget('textField',{},{original : 'initial value'});
Mojo.Event.listen(this.controller.get('button-1'),Mojo.Event.tap, this.InsertRow)
var attributes = {
             itemTemplate: 'DatabaseList/myRowTemplate',
             swipeToDelete: true,
         }
this.controller.setupWidget('listId', attributes);  
};

Step 4: Include the following function which performs

Reference for Queries
– Inserting a new record into the Table (ofive_Table)
– Retrieve all records from the table and Populate into the List widget

DatabaseListAssistant.prototype.InsertRow=function(event){
var db = openDatabase("MainDB", "1"); // this is all that is required to open an existing DB

db.transaction( function (transaction) {
  transaction.executeSql("INSERT INTO Ofive_Table(Title) VALUES (?)",  [$('textField').innerText],
      function(transaction, results) {    // success handler
      Mojo.Log.info("Successfully inserted record");
      },
      function(transaction, error) {      // error handler
       Mojo.Log.error("Could not insert record: " + error.message);
      }
  );
  transaction.executeSql("SELECT * FROM Ofive_Table",  [],
                         function(transaction, results) {    // success handler
			  var Ar1=[]
                          for(i=0;i<results.rows.length;i++)
			  {
			  Ar1.push({data: results.rows.item(i).Title})
			  }
			 $("listId").mojo.noticeUpdatedItems(0, Ar1);
                         },
                         function(transaction, error) {      // error handler
                           Mojo.Log.error("Could not insert record: " + error.message);
                         }
  );
})	

}

Output

Storage Database in webOS

HTML5 storage Database is generally referred as SQLlite. It is to handle minimal database and Query.

Please refer Basic App Creation in PALM

Step1 :Create Basic Scene “Database”

in Database-Scene.html

<div>Database Tutorial</div>

<div id="textField"></div> <!-- Open field for user to enter values -->
<div id="button-1"></div> <!-- Insert Button, to tigger insert query -->
<div id="button-2"></div> <!-- Retrieve Records from the table -->
<div id="Records"></div> <!-- Display Records -->

Step2 : In Database-Assistant.js

DatabaseAssistant.prototype.setup = function() {
var name = "MainDB";  // required
var version = "1";  // required

var db = openDatabase(name, version); // Open Database
if (!db) {
  Mojo.Log.error("Could not open database"); // If Database is not available , it throws an error message
} else {
  var sql = "CREATE TABLE IF NOT EXISTS 'Table1' (Title TEXT)";
  db.transaction(
  	function (transaction)
  	{
    transaction.executeSql(sql,[], function(transaction, results)
    							   {Mojo.Log.info("Successfully created table")},
    							   function(transaction, error)
    							   {Mojo.Log.error("Could not create table: ")});
  });
}
this.controller.setupWidget('button-1',{},{buttonLabel: 'Insert'}); //Giving the button label as Insert
this.controller.setupWidget('button-2',{},{buttonLabel: 'Retrieve Data'}); // To give the button label as Retrieve
this.controller.setupWidget('textField');
Mojo.Event.listen(this.controller.get('button-1'),Mojo.Event.tap, this.InsertRow) //One Tab of Insert Button, function InsertRow will be called
Mojo.Event.listen(this.controller.get('button-2'),Mojo.Event.tap, this.RetrieveRows) // on Tab of Retrieve Button, function Retrieve Rows will be called
};

Step 3: Include functions below
1. To Insert Row into Table

DatabaseAssistant.prototype.InsertRow = function(event) {
var test = $('textField').innerText;

var db = openDatabase("MainDB", "1"); // this is all that is required to open an existing DB
var sql = "INSERT INTO 'Table1' (Title) VALUES (?)";

db.transaction( function (transaction) {
  transaction.executeSql(sql,  [test],
                         function(transaction, results) {    // success handler
                           Mojo.Log.info("Successfully inserted record");
                         },
                         function(transaction, error) {      // error handler
                           Mojo.Log.error("Could not insert record: " + error.message);
                         }
  );
})
};

2. To Retrieve Rows from table

DatabaseAssistant.prototype.RetrieveRows = function(event) {
var db = openDatabase("MainDB", "1");
var sql = "SELECT * FROM 'Table1'";

db.transaction(function(transaction) {
  transaction.executeSql(sql, [],
                         function(transaction, results) {
                           // results.rows holds the rows returned by the query
                           $("Records").innerHTML=""
                           for(i=0;i<results.rows.length;i++)
                           $("Records").innerHTML += results.rows.item(i).Title +"
"
                         },
                         function(transaction, error) {
                           Mojo.Log.error("Could not read: " + error.message);
                         });
});
};

Important Notes

db.transaction(
function(transaction) {
  transaction.executeSql(sql, [],
                         function(transaction, results) {
                          // this function is a success handler, if the query executed properly, this function will be called
                         },
                         function(transaction, error) {
                         // This function is a failure handler, if any error executing the query.
                         });
});

We can have multiple transaction of queries like below

db.transaction(InsertQuery,[values],SuccessHandler(transaction,results), FailureHandler(transaction,error))
db.transaction(SelectQuery,[],SuccessHandler(transaction,results), FailureHandler(transaction,error))
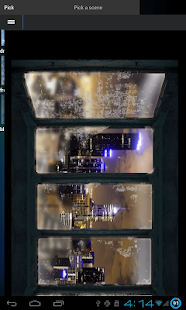
Output

Dynamic List in webOS

Refer Palm App :Basic App for Creating a basic App

The list is the most common component. In Webos, list objects are rendered into
the provided HTML templates.

Two HTML templates are necessary to render the list objects. listTemplate and
itemTemplate

List has many attributes to define among which

1. listTemplate – declaration to refer listTemplate

2. itemTemplate – declaration to refer itemTemplate

3. emptyTemplate – declaration to refer is values are empty

Step1 : Create a basic scene “List”

List-Scene.html

List Declaration

<div x-mojo-element=”List” id=”listId” name=”listName”></div>

Step 2: Defining the List itemTemplate, create a new HTML file in the same folder
of List named “myRowTemplate”. This template name to be referenced in “itemTemplate”
attribute property.

myRowTemplate.html

<div class=”palm-row” x-mojo-tap-highlight=”momentary”>
//x-mojo-tab-highlight to highlight the list item when the user taps,
palm-row is an inbuilt class.#{data} // is the Object Name from the declaration</div>


Create a folder named “Data” and paste test.xml

Test.XML

<l>
  <citem>
    <id>1</id>
    <userId>UserID1</userId>
    <pwd>adsdasdasd</pwd>
  </citem>
  <citem>
    <id>2</id>
    <userId>UserID2</userId>
    <pwd>adsdasdasd</pwd>
  </citem>
  <citem>
    <id>3</id>
    <userId>UserID3</userId>
    <pwd>adsdasdasd</pwd>
  </citem>
  <citem>
    <id>4</id>
    <userId>UserID4</userId>
    <pwd>adsdasdasd</pwd>
  </citem>
  <citem>
    <id>6</id>
    <userId>UserID5</userId>
    <pwd>adsdasdasd</pwd>
  </citem>
  <citem>
    <id>7</id>
    <userId>UserID6</userId>
    <pwd/>
  </citem>
  <citem>
    <id>8</id>
    <userId>UserID7</userId>
    <pwd></pwd>
  </citem>
</l>

List Widget Declaration
There are two ways to set the List Widget Properties, here i am not assigning any data items to list as we are going to populate dynamically from XML file.

one Way

ListAssistant.prototype.setup = function() {

this.controller.setupWidget(“listId”,

this.attributes = {

itemTemplate: ‘List/myRowTemplate’,

swipeToDelete: true,

});

};


Alternate Way

ListAssistant.prototype.setup = function() {

var attributes = {
             itemTemplate: 'List/myRowTemplate',
             swipeToDelete: true,
         }
this.controller.setupWidget('listId', attributes);
};


Final code will look like below with loading XML.
Step 3: In scene assistant


ListAssistant.prototype.setup = function() {
xmlhttp=new XMLHttpRequest();
xmlhttp.onreadystatechange=handler
xmlhttp.open("GET","Data/test.xml");
xmlhttp.send();

var attributes = {
             itemTemplate: 'List/myRowTemplate',
             swipeToDelete: true,
         }
this.controller.setupWidget('listId', attributes);
};


Step 4: Add below function

function handler()
{	
	if(this.readyState == 4 && (this.status == 200 || this.status == 304))
    {
		  if(this.responseXML != null)
		  {
		  xmlDoc=this.responseXML.getElementsByTagName("userId")
		  var Ar1=[]
		  for(i=0;i<xmlDoc.length;i++)
		  {
		  Ar1.push({data: xmlDoc[i].firstChild.nodeValue})
		  }
		  $("listId").mojo.noticeUpdatedItems(0, Ar1); 
		  }
	} 
	else if(this.readyState == 4)
	{
	alert("Error Reading List")
	}
};


listWidget.mojo.noticeUpdatedItems(offset, items)
, where:

Argument Type Description
offset Integer Index in the list of the first object in ‘items’; usually the same as ‘offset’ passed to the itemsCallback
items Array An array of the list item model objects that have been loaded for the list

Notes

$("listId").mojo.noticeUpdatedItems(0, Ar1);  //$ is quite equivalent 
to document.getElementById in Ajax way. noticeUpdatedItems is the property of 
list to populate list with an array.


OutPut

List Widget in webOS

Refer Palm App :Basic App for Creating a basic App

The list is the most common component. In Webos, list objects are rendered into
the provided HTML templates.

Two HTML templates are necessary to render the list objects. listTemplate and
itemTemplate

List has many attributes to define among which

1. listTemplate – declaration to refer listTemplate

2. itemTemplate – declaration to refer itemTemplate

3. emptyTemplate – declaration to refer is values are empty

Step1 : Create a basic scene “List”

List-Scene.html

List Declaration

<div x-mojo-element=”List” id=”listId” class=”listClass” name=”listName”></div>

Step 2: Defining the List itemTemplate, create a new HTML file in the same folder
of List named “myRowTemplate”. This template name to be referenced in “itemTemplate”
attribute property.

myRowTemplate.html

<div class=”palm-row” x-mojo-tap-highlight=”momentary”>
//x-mojo-tab-highlight to highlight the list item when the user taps,
palm-row is an inbuilt class.#{data} // is the Object Name from the declaration

</div>

Step 3: In scene assistant:

ListAssistant.prototype.setup = function() {

this.controller.setupWidget(“listId”,

this.attributes = {

itemTemplate: ‘List/myRowTemplate’,

swipeToDelete: true,

},

this.model = {

listTitle: ‘Servers’,

items : [

{data:”Value1″},

{data:”Value2″},

]

});

};

OutPut

Modifying myRowTemplate a little bit

<div class=”palm-row” x-mojo-tap-highlight=”momentary”>
<div style=”float:left”><img src=”images/RightArrow.png” /></div><div
style=”float:left”>#{data}</div>
</div>

Output 2


Load XML in webOS

Read XML in webOS

Refer Palm App :Basic App for Creating a basic App

Step1 : Create a folder named “Data” and paste test.xml

Test.XML

<l>
<citem>
<id>1</id>
<userId>rrrtttt1111117779999999999999</userId>
<pwd>adsdasdasd</pwd>
</citem>
<citem>
<id>2</id>
<userId>111111aaa</userId>
<pwd>adsdasdasd</pwd>
</citem>
<citem>
<id>3</id>
<userId>333333333</userId>
<pwd>adsdasdasd</pwd>
</citem>
<citem>
<id>4</id>
<userId>33333333311111111</userId>
<pwd>adsdasdasd</pwd>
</citem>
<citem>
<id>5</id>
<userId>Laaaaa222222</userId>
<pwd>adsdasdasd</pwd>
</citem>
<citem>
<id>6</id>
<userId>11111111qqqqq333333333</userId>
<pwd>adsdasdasd</pwd>
</citem>
<citem>
<id>7</id>
<userId>456</userId>
<pwd/>
</citem>
<citem>
<id>8</id>
<userId>tyrrr</userId>
<pwd></pwd>
</citem>
</l>

Step 2: In Scene1-scene.html , Include another <div> tag to load the XML data

<div id=”XMLData”></div>

Entire Code of Scene1-scene.html will look like below

<div id=”main” class=”palm-hasheader”>

<div class=”palm-header”>Header</div>

<div id=”count” class=”palm-body-text”>Hello World</div>

<div id=”XMLData”></div>

</div>

Step 3: Scene1-scene.html corresponding javascript file is
Scene1.assistant.js. Whatever javascript related to this scene can go in to this
javascript

Each javascript file has four events (Setup / Activate /cleanUp /deactivate)
related to the scene

1. Scene1-assistant.js

2. Edit the setup function to contain the following:

Scene1Assistant.prototype.setup = function() {

xmlhttp=new XMLHttpRequest();

xmlhttp.onreadystatechange=handler

xmlhttp.open(“GET”,”Data/test.xml”);

xmlhttp.send();

};

3. Add the following funtion

function handler()
{
if(this.readyState == 4 && (this.status == 200 || this.status == 304))
{
if(this.responseXML != null)
{
xmlDoc=this.responseXML
document.getElementById(“XMLData”).innerText=this.responseText  //It loads the XML content and writes into the DIV tag with ID XMLData}
}
}

Output